
- August 20, 2026
- Posted by: wellcoindustries
- Categories: Burlap, Erosion Control
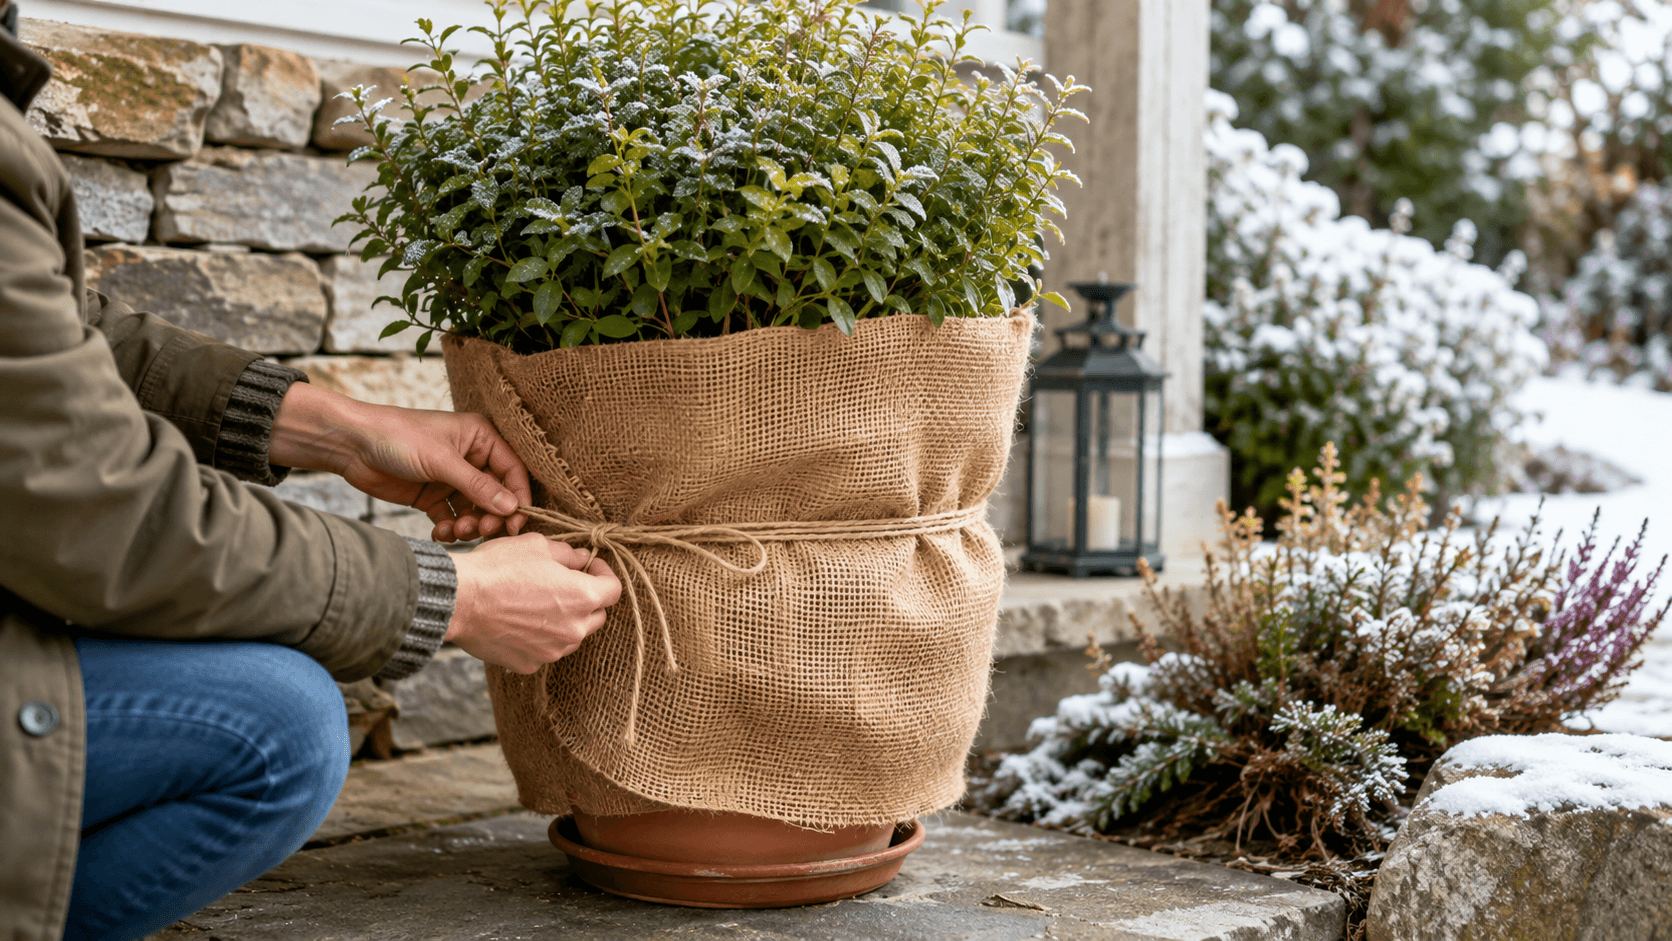
To wrap a potted plant in burlap for winter, focus first on the container and root zone. Move the pot to a sheltered location, confirm that water can still drain, wrap burlap around the sides of the container, and secure it without blocking the drainage holes or sealing the plant inside. Burlap can be one part of winter protection, but it cannot make a tender plant hardy enough to remain outdoors in every climate.
Before You Wrap: Decide Whether the Plant Should Stay Outside
Potted plants face colder root conditions than the same plants growing in the ground. A container exposes the root ball to cold air from the sides, and repeated freezing and thawing can also damage some pots. The first decision is therefore not how much burlap to use, but whether the plant and container are suitable for outdoor overwintering.
Use this quick decision check:
| Check | What It Means |
|---|---|
| The plant is not hardy in your local climate | Move it to a suitable protected location rather than relying on burlap alone. |
| The plant is a cold-hardy perennial, shrub, or small tree | Outdoor protection may be practical, depending on the site and container. |
| The pot is small or exposed on all sides | The root zone is more vulnerable; grouping, shelter, and container insulation become more important. |
| The container can crack during freeze-thaw cycles | Move or protect the container according to its material and condition. |
| Drainage holes are blocked | Correct the drainage problem before wrapping. |
University of Illinois Extension notes that roots in containers are less insulated than roots in the ground and recommends protected locations, grouping pots, mulching, sinking pots into the ground, or moving them into an appropriate unheated structure when conditions require it.[1][2]
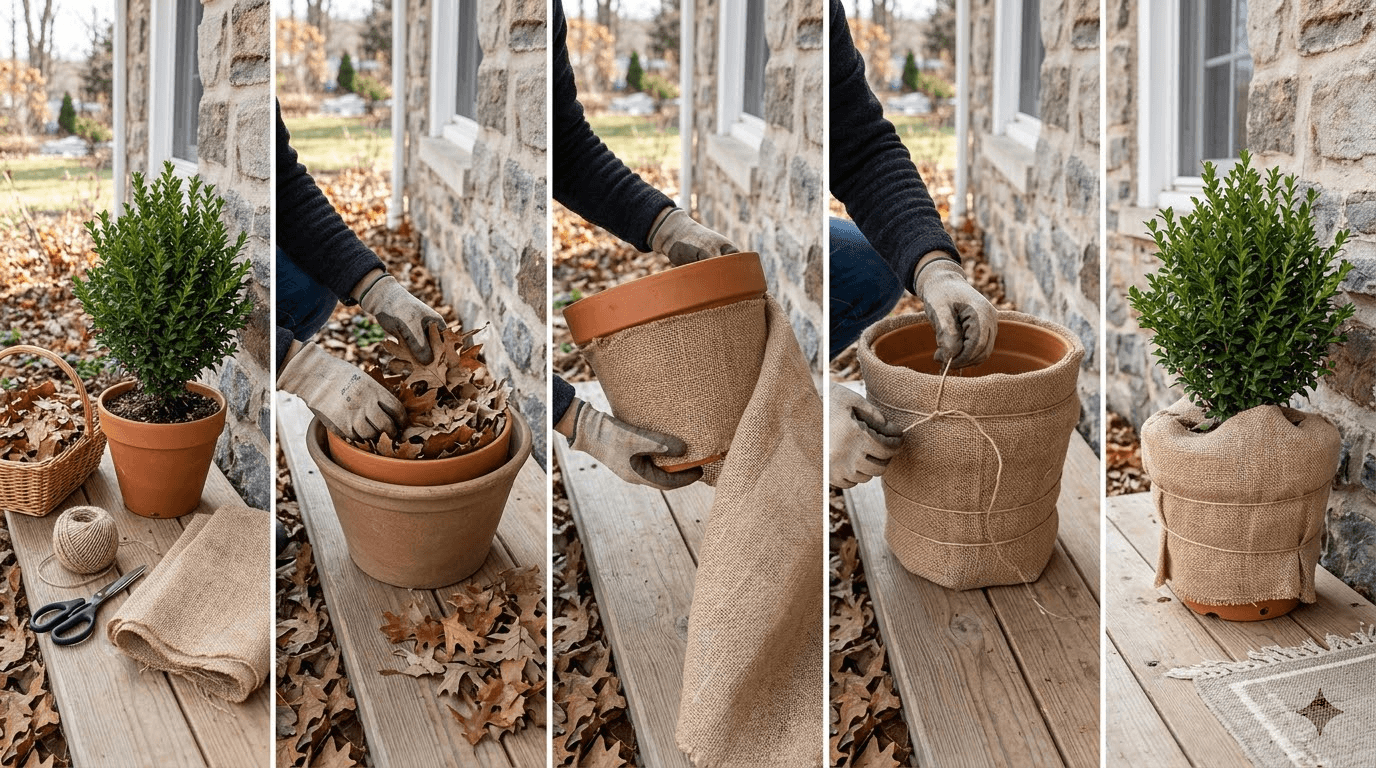
Materials
- Burlap fabric wide enough to cover the sides of the pot
- Soft twine or reusable plant ties
- Scissors
- Optional dry leaves, straw, or another suitable insulating material
- Optional stakes if a separate wind screen is needed around the plant
Choose the burlap according to the size of the container and the way it will be secured. We offer burlap rolls for bulk and project requirements. Send us the required roll dimensions, fabric specification, quantity, packaging and delivery requirements for your application.
Step 1: Move the Pot to a Sheltered Position
Place the container where it is less exposed to prevailing wind and rapid temperature swings. If you have several compatible potted plants, group the containers together in a protected area. Putting pots on the ground rather than leaving them elevated on an exposed deck may also reduce exposure.
Do not choose a location based on warmth alone. The plant still needs conditions appropriate to its species and dormancy requirements. Tender tropical plants and cold-hardy dormant perennials do not have the same winter needs.
Step 2: Check Moisture and Drainage
Water the plant as appropriate before the growing medium freezes, and continue checking moisture during winter when conditions allow. The goal is not to keep the pot constantly wet. It is to prevent avoidable drying while maintaining drainage.
Before adding burlap:
- Confirm that the drainage holes are open.
- Remove standing water from saucers.
- Check the pot for cracks or weak areas.
- Make sure the wrap will not trap water against the container.
Container material matters. Freezing and thawing can damage some containers, so inspect the pot for cracks or weak areas and keep its drainage path open.[1][2]
Step 3: Measure the Container
Measure the circumference and height of the pot. Cut a piece of burlap long enough to:
- cover the exposed sides of the container;
- overlap at the vertical edge;
- leave enough material for secure ties;
- keep the bottom drainage area open.
Measure the container rather than automatically measuring the full plant height. For most potted-plant winter setups, protecting the root zone is the first priority. If the branches also need protection from wind or snow, treat that as a separate support or screen rather than tightly binding the entire plant.
How Much Burlap Do You Need?
Required burlap length is approximately the container circumference plus enough material for overlap and secure fastening.
The burlap width should cover the exposed height of the container while leaving the drainage area open. For multiple pots, multiply the required length per container by the number of pots, then allow additional material for overlaps, ties and cutting.
Do not rely on one standard allowance for every project. Pot shape, burlap orientation, wrapping method and the use of additional insulation can change the amount required.
Step 4: Add Insulation Around the Pot if Needed
Wrap the burlap around the container. Where the climate, plant, and site call for additional insulation, dry leaves, straw or another suitable insulating material may be held around the sides of the pot with the burlap.[1][2] Keep loose material away from drainage openings and do not pack it against stems or crowns.
The finished wrap should cover the container sides without creating a sealed bag. Burlap is a woven material, but the complete setup still needs air movement and a path for water to leave the pot.
Step 5: Secure the Burlap
Tie the burlap around the pot with soft twine or plant ties. Use enough tension to keep the fabric from slipping, but do not pull so tightly that the wrap deforms the pot or presses against stems.
Check three points before moving on:
- the overlap stays closed in wind;
- the drainage holes remain open;
- the top of the growing medium and the plant crown are not sealed under wet fabric.
If the plant needs a wind barrier, place stakes around it and attach burlap to the stakes. This creates separation between the fabric and the foliage. University of Minnesota Extension recommends a burlap or similar barrier on the exposed sides of susceptible evergreens while leaving the top open for air and light.[3]
Step 6: Inspect the Setup During Winter
Winter protection is not a one-time installation. Check the pot after strong wind, heavy rain, snow, or a freeze-thaw cycle.
Look for:
- loose or shifted ties;
- saturated fabric that stays against the container;
- blocked drainage;
- pooled water;
- animal nesting or chewing;
- branch pressure from snow or ice;
- unusually dry growing medium during a mild period.
Adjust the wrap when it moves or becomes damaged.
Common Mistakes
| Mistake | Better Approach |
|---|---|
| Assuming burlap makes any plant winter-hardy | Start with the plant’s hardiness and local conditions. Move tender plants when necessary. |
| Wrapping foliage and pot into one tight bundle | Protect the container first; use a supported screen when above-ground protection is needed. |
| Blocking drainage holes | Leave the bottom drainage path open and inspect it during winter. |
| Wrapping a dry plant and forgetting it | Check moisture before freezing and during suitable winter weather. |
| Leaving pots exposed on a windy deck | Group compatible pots and use a sheltered position when practical. |
| Leaving the wrap in place after active growth resumes | Remove the protection when winter risk has passed and inspect the plant and pot. |
When to Remove the Burlap
Remove or loosen the burlap after the main winter risk has passed and the plant begins returning to active growth. The timing depends on local conditions and the plant, not a fixed calendar date.
Dry the burlap before storing it. Inspect it for tears, contamination, or deterioration before considering reuse. Reuse is a condition-based decision, not a guaranteed product life.
Frequently Asked Questions
Does burlap keep a potted plant from freezing?
Burlap around a container can be part of a root-zone protection system, but it does not guarantee that the growing medium or roots will remain unfrozen. Plant hardiness, container size, minimum temperature, wind exposure, moisture, and the rest of the protection method all affect the result.
Should burlap touch the plant?
For container insulation, wrap the pot rather than pressing wet fabric tightly against foliage. If above-ground protection is needed, a supported burlap screen can create separation and reduce wind exposure. The correct method depends on the plant and site.
Can I cover the drainage holes?
No. Keep the drainage path open. Trapped water can create root and container problems, especially during freeze-thaw cycles.
Is burlap enough for a tropical potted plant?
Usually not. Plants that are not hardy in the local climate may need to be moved to an appropriate indoor or protected location. Match the storage conditions to the species; not every plant should be treated as a dormant hardy perennial.
Choose Burlap for Your Container-Wrapping Plan
Before requesting product details, record the pot height, circumference, number of containers, expected overlap, and whether the burlap will wrap the container or form a supported screen. Then view our burlap rolls for bulk and project requirements or send us the dimensions, quantity, application, and delivery location at [email protected].
For protection methods focused on trees and shrubs rather than potted-container wrapping, see our burlap winter protection guide.